# Microsoft Teams Notification Configuration
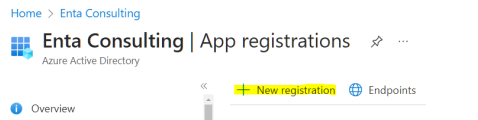
To allow the RPA Connect application to generate notifications through Teams, you first need to create the corresponding application. From Microsoft Entra ID, navigate to ***App Registration > New registration***.
Application registration
Enter the desired name for the application (e.g., RPA Connect – Notifications) and select the option ***Accounts in this organizational directory only***. Click the ***Register*** button to confirm.
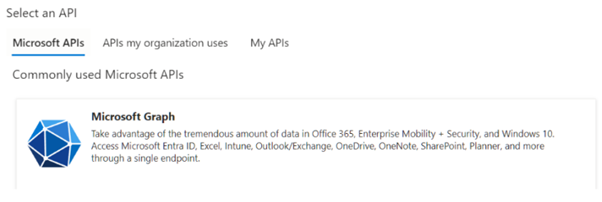
Next, go to ***API Permission*** and press ***Add a Permission***. Select the Microsoft Graph API to configure its permissions. This will allow notifications to be sent to groups and users.
API selection
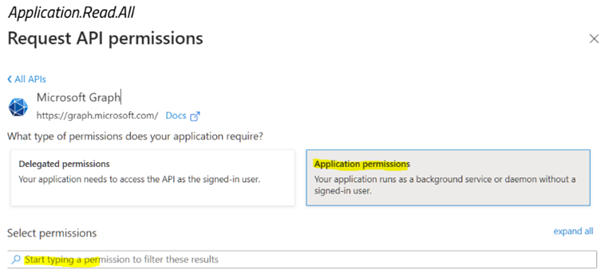
Click on ***Application permissions*** and use the search bar to find the permissions ***GroupMember.Read.All*** and ***Application.Read.All***.
Application permissions
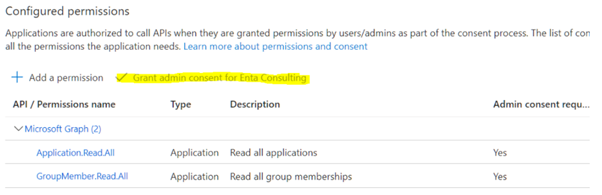
Once you have located them, check the box ***Grant admin consent…*** to authorize their use.